
- Traceability Suite
- How to install add-in
How to install add-in
Download and Install
The URL to download the installer is included in the email from us. The installer is a Windows Installer (msi) file, so double-clicking the msi file will install the add-in.
There are two types of installers. One is for a 32-bit build of Enterprise Architect (all versions before 15.2 and a 32-bit build of version 16.0 or later). The other is for a 64-bit build of Enterprise Architect (version 16.0 and later). Please download and install the appropriate one for your Enterprise Architect.
The add-in will not work if you launch Enterprise Architect after installation because you have not registered the license yet. Please register your license and restart Enterprise Architect.
Register a Standard License
[Click here to show detail]
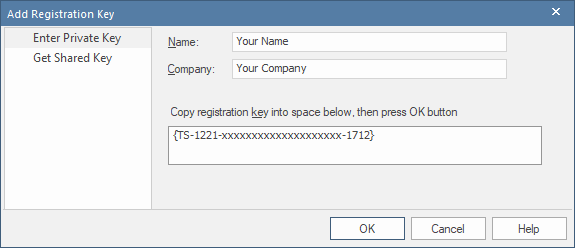
To register a Standard license (including a Trial Standard license), open Enterprise Architect's 'License Management' dialog. You can open the dialog via the 'Start' Ribbon | 'Help' panel | 'Register' button.
Press the 'Add Key' button, copy and paste your license key into the textbox, and press the 'OK' button. The format of the license key is '{TS-mmyy-xxxxxxxxxxxxxxxxxxxxxx-xxxx}', and 'mmyy' means expired year and month. For Trial keys, the key format is different.
If successful, the following message is displayed.
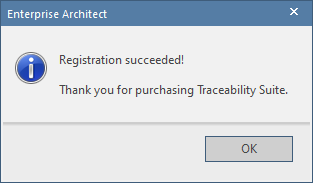
Restart Enterprise Architect to activate the license. You can use the add-in until the license expires.
Register a Floating License
When you purchase a Floating license (including a Trial Floating license), you must register the keys with your floating license server. It is necessary to use Pro Cloud Server v4.2.66 or later to apply the keys of the add-in. You can download Pro Cloud Server from SparxSystems.com website.
(Note: You must have an active Enterprise Architect subscription to download the Sparx Keystore Service or Pro Cloud Server. Sparx Systems Japan does not provide these installers. You can download the latest Pro Cloud Server from the SparxSystems.com website using your user ID and password of your Enterprise Architect subscription.)
if you are NOT using the Group feature of floating licenses, you can use Sparx Keystore Service v2.3 or later. (i.e. if you specify 'AUTHMETHOD=AM_GLOBALPASSWORD' in your config file, the Group feature is not used, and you can apply and use the floating license of the add-in.)
Add Keys to your Server - Pro Cloud Server
[Click here to show detail]
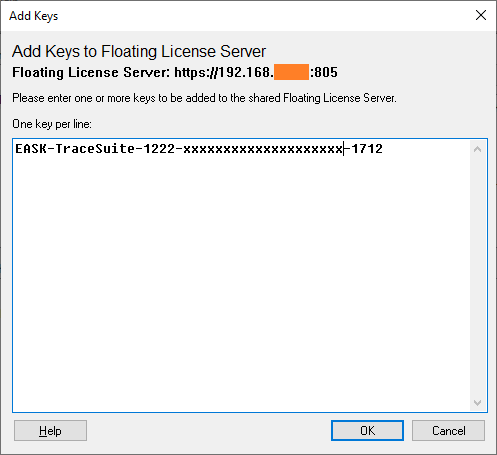
Launch the Floating License Config Client from the Windows Start menu, connect to your license server. Press the Add key(s) button on the toolbar, then enter your floating license key(s) as follows:
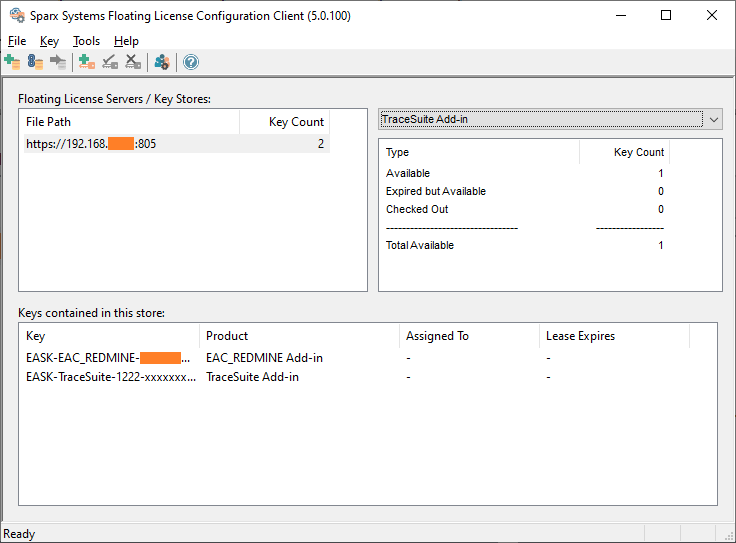
After adding the keys, you can confirm them in the list of the Configuration Client dialog.
Then you need to apply the add-in license to the group(s) you want to use it. Open the 'Floating License Server - Groups' dialog from the toolbar of the Configuration Client dialog and edit an existing group. In the 'Floating License Server - Group Details' dialog (below), press the 'Add...' button and enter information as shown below.
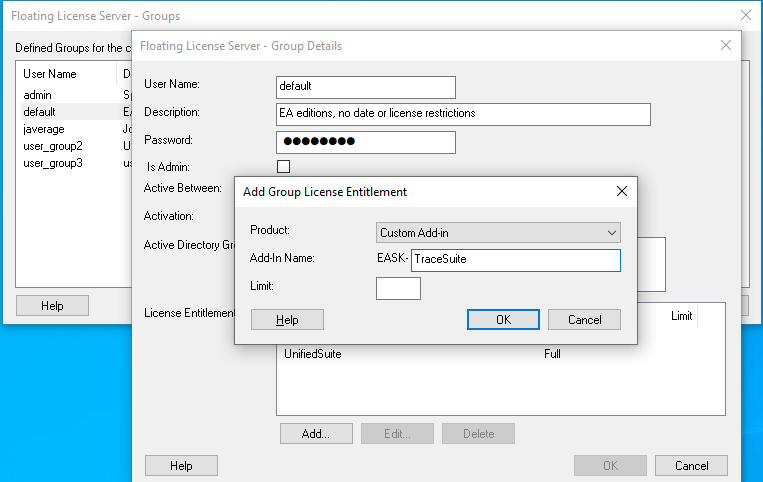
The license will be added to your server. Please check if you can get the license from the Enterprise Architect client with the group ID and password you added.
Add Keys to your Server - Sparx Keystore Service
[Click here to show detail]
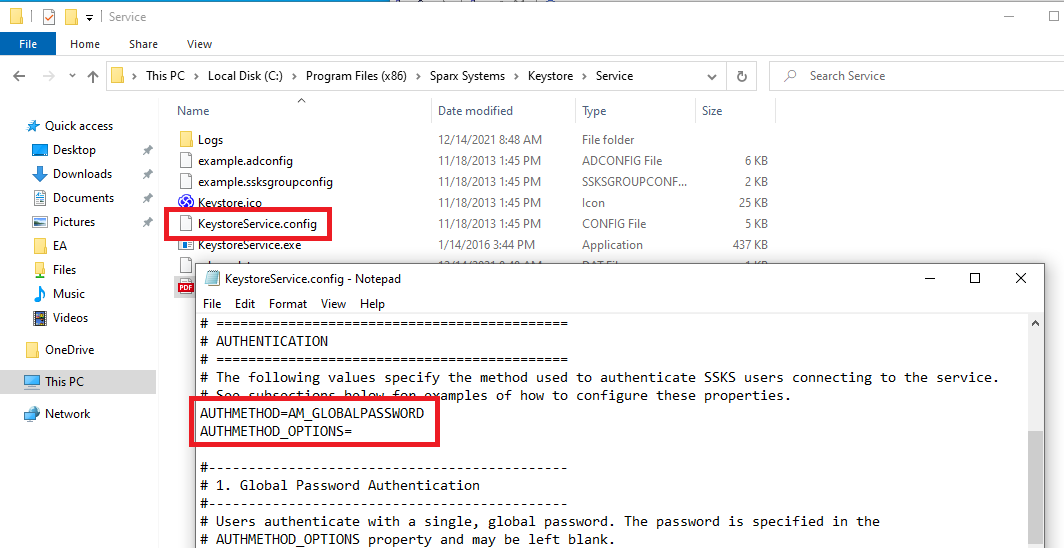
First, open your KeystoreService.config file and make sure that the value of the AUTHMETHOD option is AM_GLOBALPASSWORD. If it is anything else, you will not be able to apply the add-in license keys. Please use Pro Cloud Server v4.2.66 or later.
Launch 'KeystoreManager.exe' from the Windows Start menu, then connect to your license server. Press the Add key(s) button on the toolbar, then enter your floating license key(s) as follows:
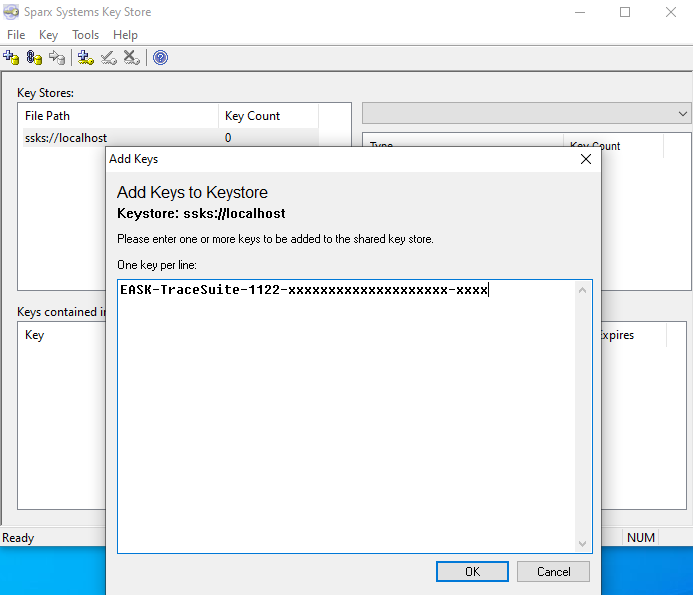
Now the license(s) will be added to your server. Please check if you can get the license from the Enterprise Architect client.
Get Key in Enterprise Architect
After the setting described above, each Enterprise Architect user can get the add-in key in the same way as Enterprise Architect licenses.
Please note that users must restart Enterprise Architect after getting the add-in key.